Junior
Cert Art Project – Option
For the option you can choose between creating a lino
print or a fabric print.
However, if any of you have a hidden talent for embroidery or any of the other
options on your exam paper, you can discuss this with me and we can come to
some arrangement.
Lino printing is the process whereby you carve shapes out
of a piece of lino to reveal a design in relief. (like a stamp) When you print
off the lino block any areas you have carved out will remain the white of the
page, and any areas left in relief will print the colour of the ink you have
rolled on the lino.
Where do you begin?
In order to create a successful lino print you need to
create a design that is appropriate for lino. Choosing the right image can play
an important part in this process. It works better if you work from a
photographic source rather than one of your own observational drawings.
Choosing the right image
Images that work best for lino are ones that have high
contrast between dark and light. Make sure your image and design are A4 in
size.
Manipulating an image
When creating a black and white lino print design you
need to ignore all of the grey tones in your image. By using a programme to
higher the contrast between black and white, it deciphers for you whether a
certain grey is closer to black or white in tone. As a result you end up with a
black and white image that is perfect for lino. You can use various programmes
to manipulate the contrast of your image e.g. Paint or Photoshop
Original
Image Manipulated
Image
Tracing the image
Your first design drawing should be in black and white.
Use a black pen and marker to trace image. Remember that your lino design
should not have any tonal work. By using a marker you will ensure that your
design is purely black and white.
Original Image
Lino Print
Support Studies
-
Image that you have chosen to use for design
-
Lino prints found online of a similar subject matter to
yours. (Take note of the name of the artist)
Preparatory Work
-
Tonal study drawing
-
Design drawing using black marker
-
Cut out with black and white card
-
Close up drawings of parts of image using a variety of
media
* See Preparatory sheet for fabric print on final page
Fabric Printing (Process
you used for shoe print last year)
Where do you begin?
You can work from a photographic source or draw from
observation for this option
-
Start with a colouring pencil tonal drawing
-
Then create a design using paint, or marker separating
the drawing into blocks of colour
-
Make sure your design is blown up to about A3 in size
-
Carefully trace off each colour on separate pages to
create stencils
Original Image 3 Colour Design White Stencil Blue
Stencil Red Stencil
Choosing the right image
The image of the ‘Statue of Liberty’ on the following
page is an excellent choice for the fabric print. The statue is in full
sunlight, which shows the form of the object very well. We can clearly make out
very defined shapes of colour which makes life much easier when designing
stencils. In the final fabric print, we can see that three tones of green were
used on the figure and two tones of grey on the plinth. Choosing an image that
has several tones of the same colour works really well in fabric printing as it
gives a three-dimensional effect.
Fabric Print
Original Image
Support Studies
-
Image that you have chosen to use for design
-
Stencil prints found online of a similar subject matter
to yours (Take note of the name of the artist)
Preparatory Work
-
Tonal study drawing in colour
-
Design drawing using markers or paint
-
Cut out with coloured card
-
Close up drawings of parts of image using a variety of
media
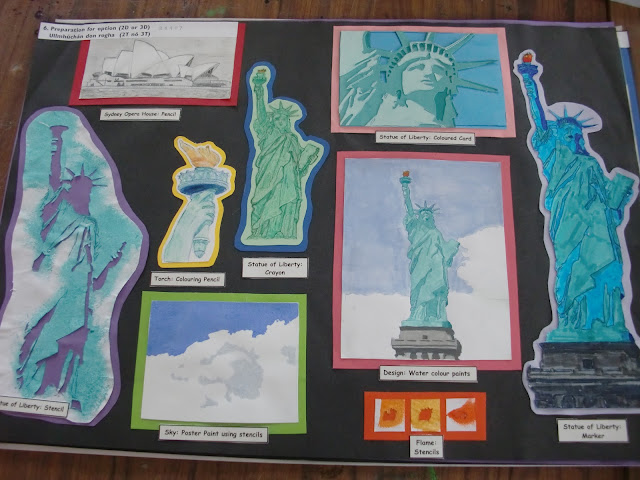
* See below for an example of a preparatory
sheet for a fabric print
Example of a preparatory sheet for a fabric print


