
The first type of print the first years produced was an engraving. They transferred their drawings onto photographic paper which acts as an etching plate. Once the outline of the drawing was transferred they had to scratch or engrave the lines into the surface of the plate using a needle.
Here are two examples of the etching plates after the drawings have been scratched in.

The plates are inked up by rubbing a mixture of oil paint and linseed oil into the scratches. The plate then needs to be polished using newspaper so that the ink remains only in the scratches and is cleaned away elsewhere. Once the plate has been polished, a sheet of good quality paper that has been soaked in water for ten minutes, and allowed to dry for ten minutes, is placed on top of the plate. A printing press is ideal to press the paper into the plate in order to force the paper into the scratches to soak up the ink. We used a spoon on the back of the paper to make the prints.


The plates are inked up by rubbing a mixture of oil paint and linseed oil into the scratches. The plate then needs to be polished using newspaper so that the ink remains only in the scratches and is cleaned away elsewhere. Once the plate has been polished, a sheet of good quality paper that has been soaked in water for ten minutes, and allowed to dry for ten minutes, is placed on top of the plate. A printing press is ideal to press the paper into the plate in order to force the paper into the scratches to soak up the ink. We used a spoon on the back of the paper to make the prints.

Engraving by Ester Ceuvas

Engraving by Jade Heeney

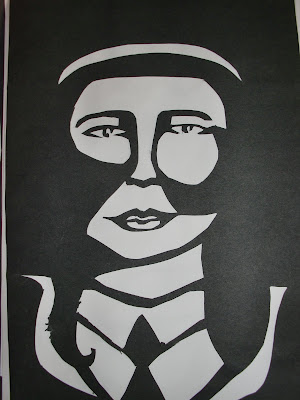
The students firstly created their design by drawing over their original pencil drawings and dividing the face in to shapes of black and white, depending on what areas were in shadow or light. They then cut their designs into black sugar paper and stuck them down on white paper. Here are the results.
 By Ester Ceuvas
 By Eleanor Selby
 by Sarah Branigan

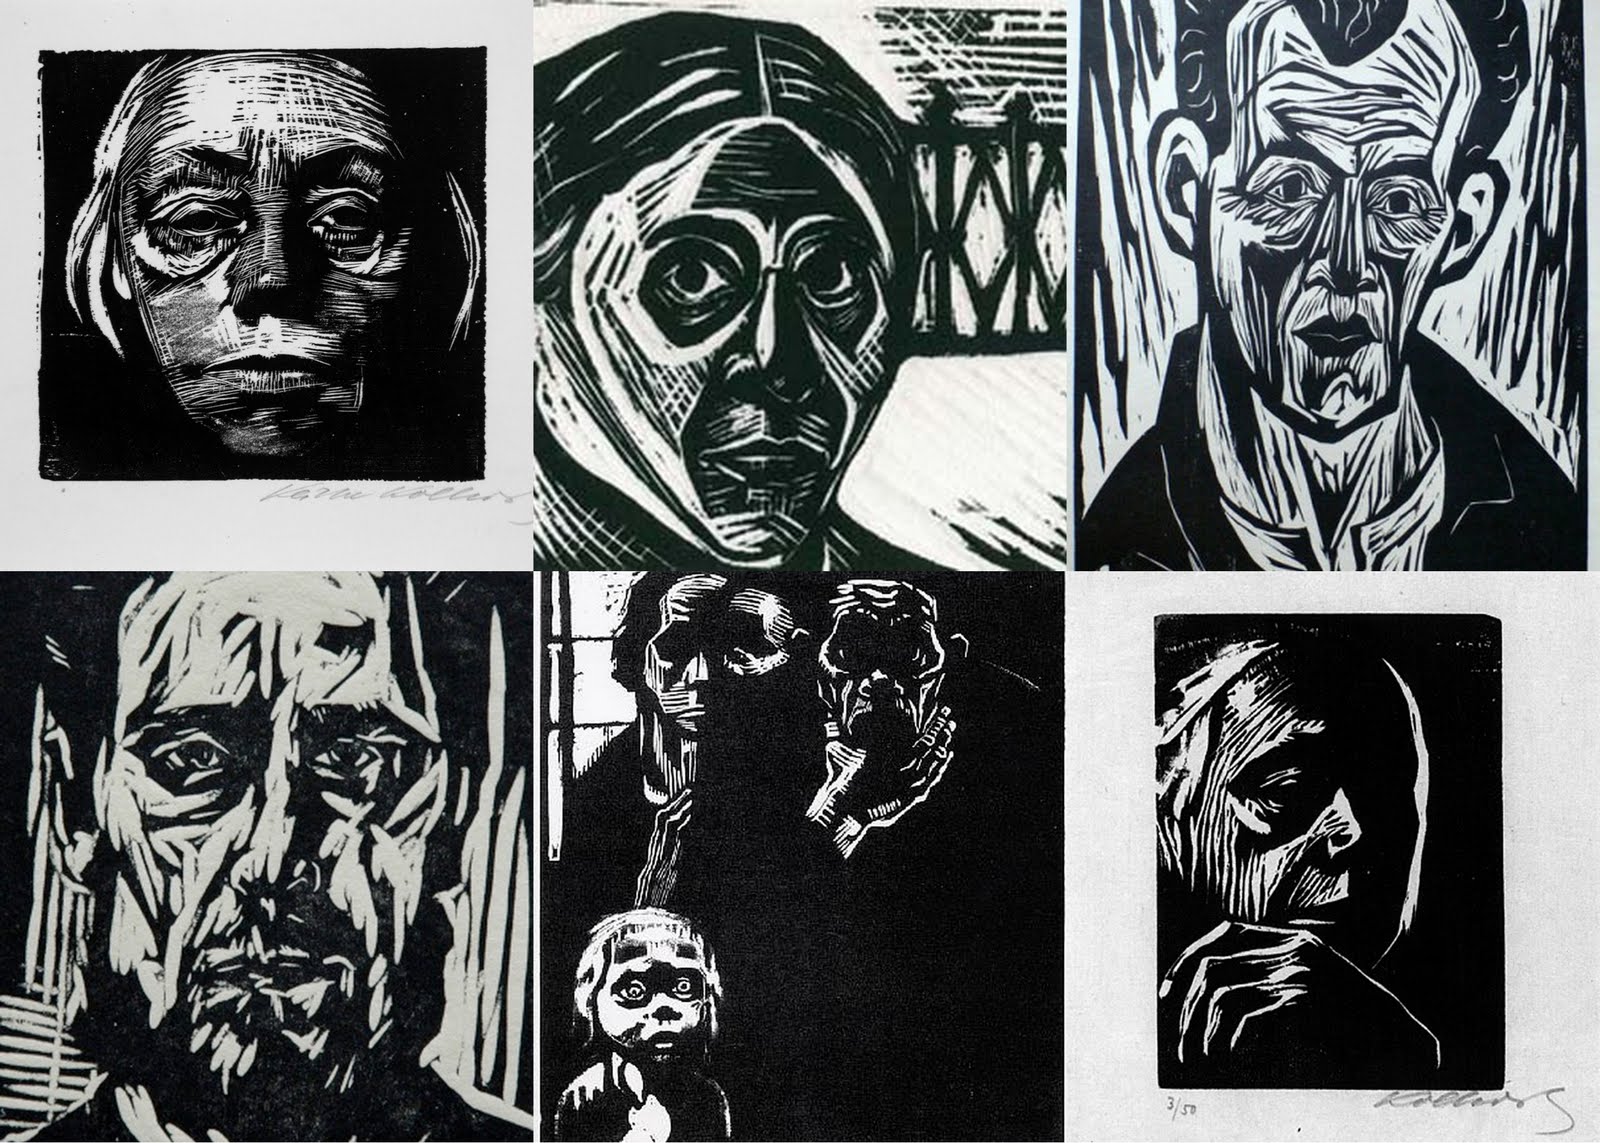
The next process was to create a design for the lino print. Here are some examples of German Expressionist woodcuts that we discussed.
The students firstly created their design by drawing over their original pencil drawings and dividing the face in to shapes of black and white, depending on what areas were in shadow or light. They then cut their designs into black sugar paper and stuck them down on white paper. Here are the results.


